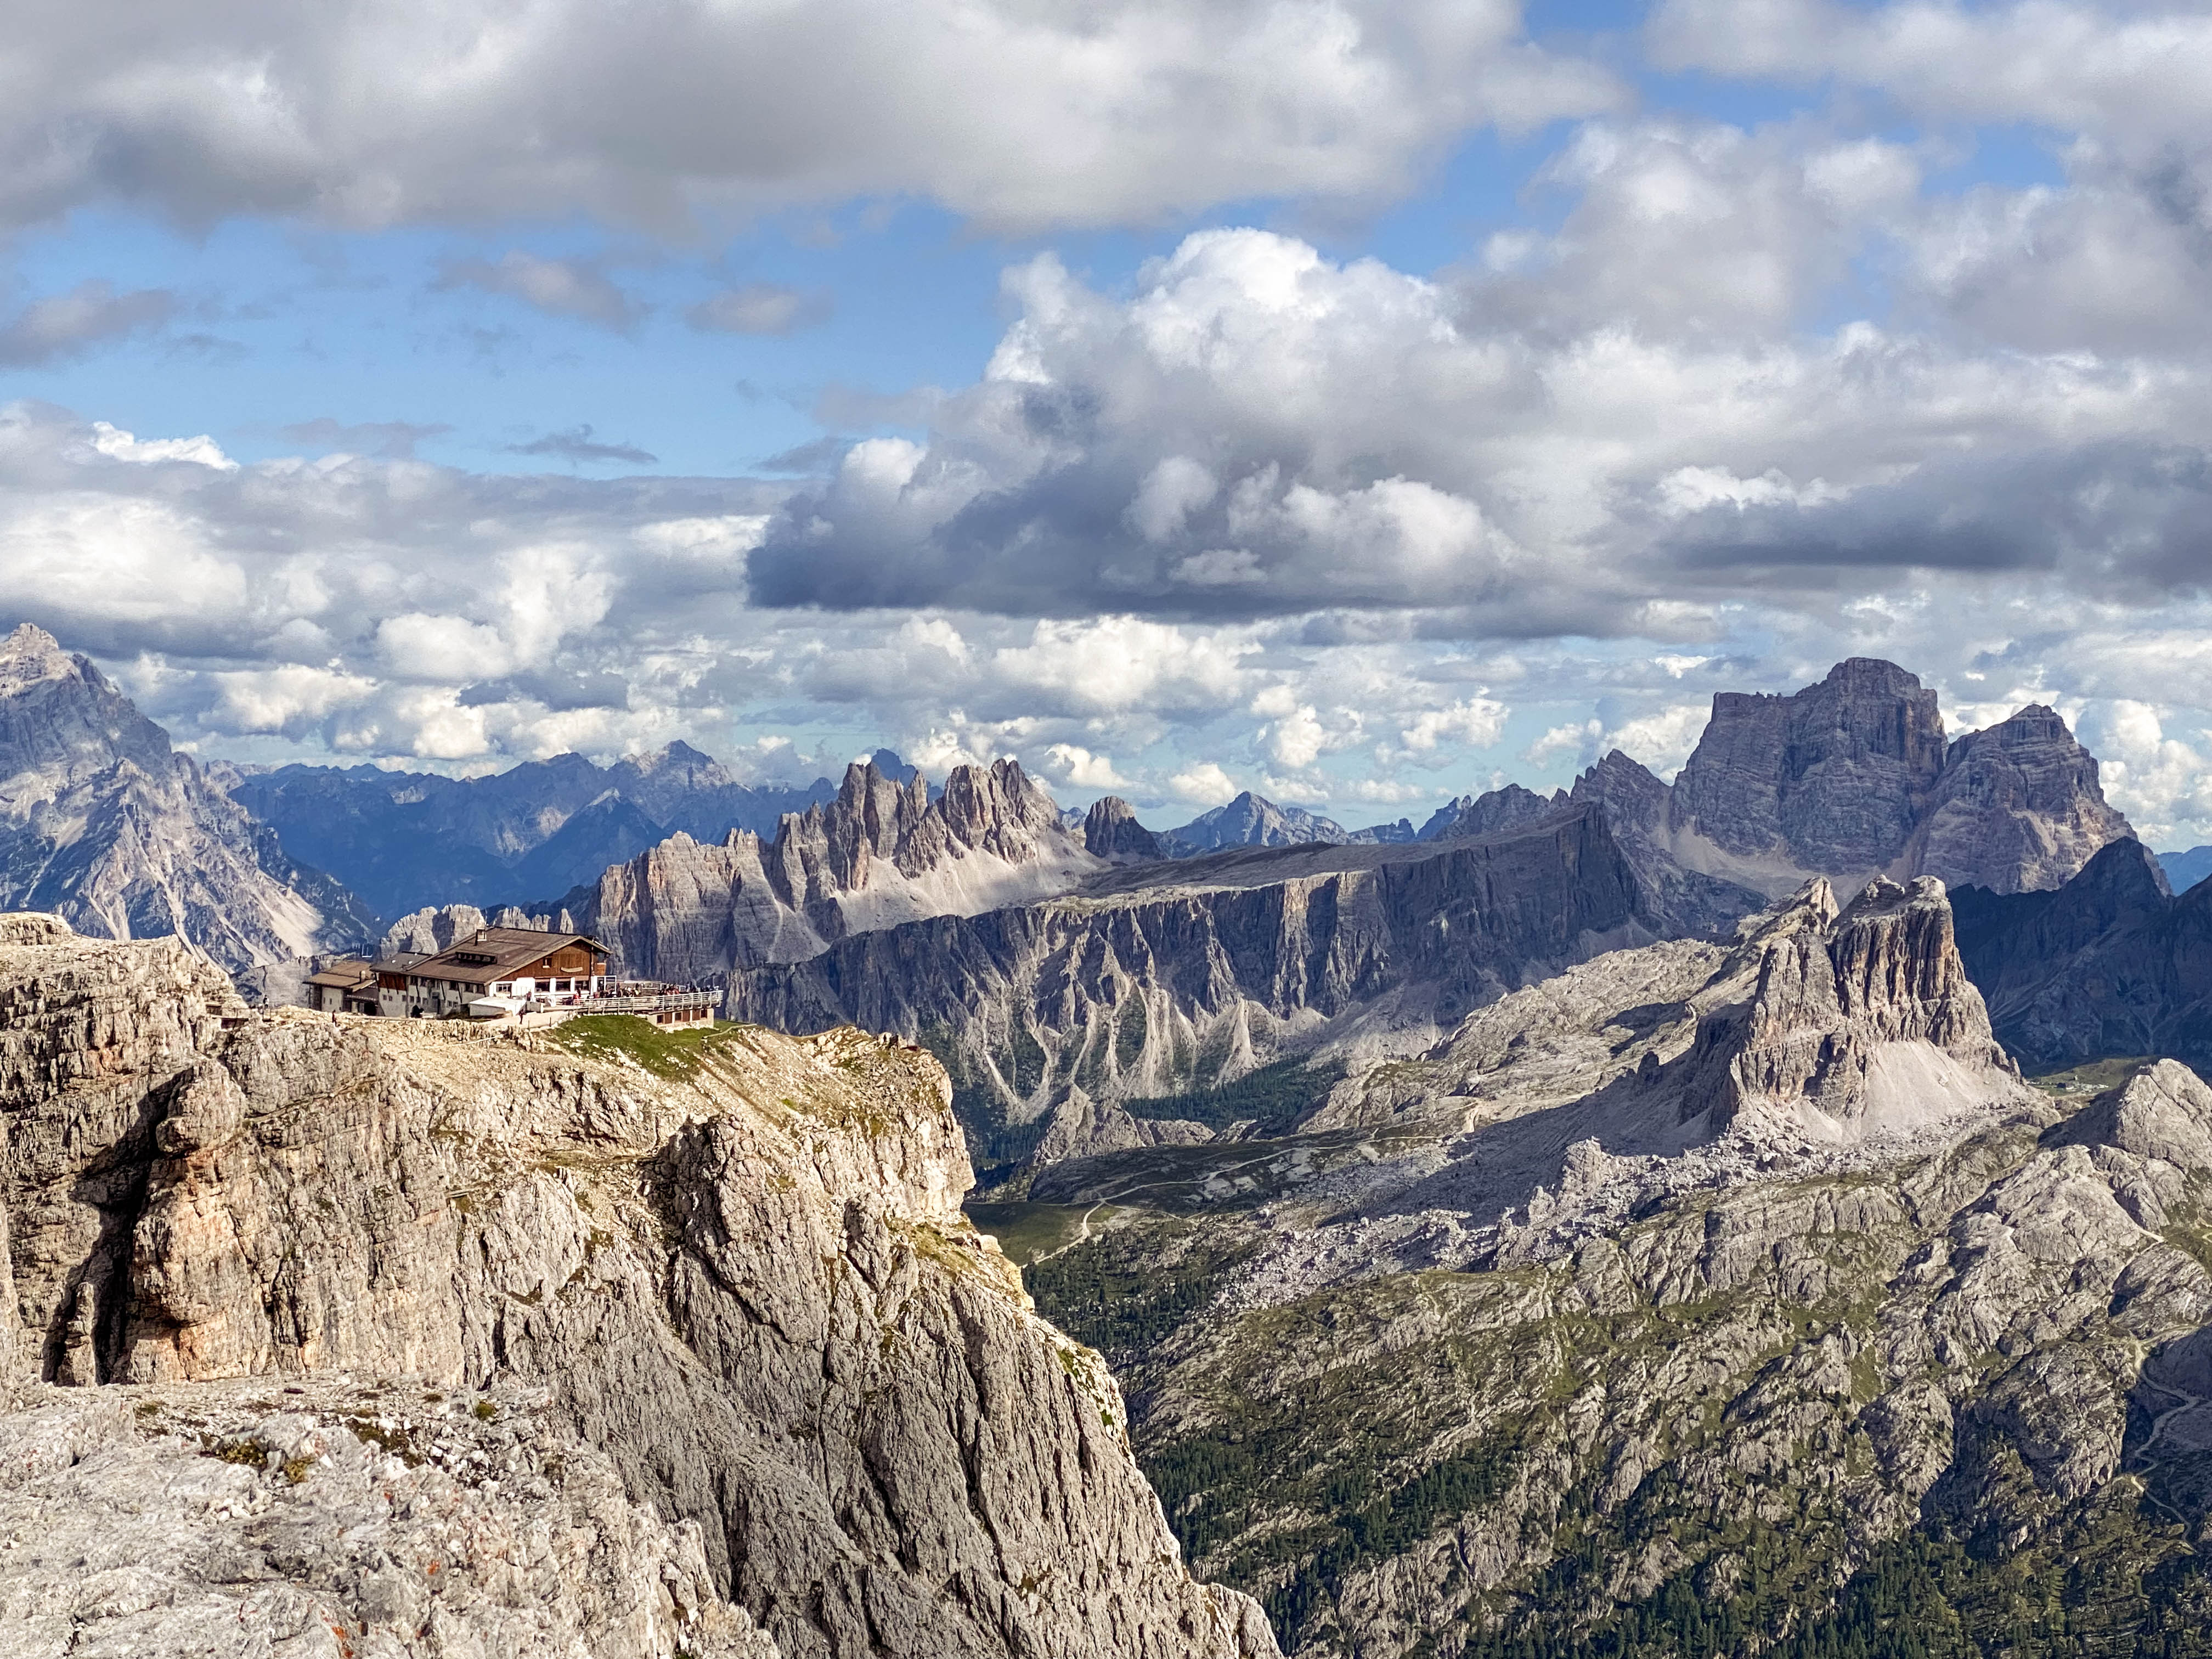
The Dolomites have been on my list for a while. I like hiking and I try to do one serious trip a year, and this region kept coming up: world-class scenery, well-marked trails, a network of cable cars that makes the best viewpoints accessible even without serious fitness. The case for going was clear.
What surprised me in the planning phase was how hard it was to pin down. The area is large, the options are overwhelming, and most guides push you toward the same handful of iconic spots without telling you how to sequence them, what to skip, or why the eastern and western sides feel like entirely different destinations. I spent a long time figuring out a week that made sense.
This guide to hiking the Dolomites is the result of that. It covers what I think is the best one-week route through the region — split between two bases, sequenced to avoid backtracking, and calibrated for someone who likes a proper hike but doesn’t want to miss the cable car views either. The Dolomites have a reputation as a hiking destination, but the infrastructure here means that even if you’re not particularly active, there’s enough accessible by gondola and short walk to make a trip genuinely worthwhile. Don’t let the branding put you off.
Table of Contents
Why the Dolomites?
The Dolomites offer something rare: world-class mountain scenery that’s surprisingly accessible.
Unlike more remote ranges where you need technical skills, multi-day backpacking endurance, or expensive guides, the Dolomites provide dramatic alpine experiences through a combination of well-maintained trails, strategically placed cable cars, and a network of mountain huts (rifugios) offering meals and accommodation.
This accessibility doesn’t diminish the experience—it enhances it. You can stand beneath the iconic Tre Cime peaks at sunrise, scramble up a via ferrata route by midday, and enjoy gourmet pasta at a refined ski town by evening. It’s a region that rewards both serious hikers and casual walkers, families and solo adventurers.
The other thing worth saying: the Dolomites don’t have just one look. The eastern side around Cortina is sharp, exposed, and dramatic — the limestone towers, the ridgelines, the hikes that require actual effort. The western side around Ortisei is softer, greener, more pastoral. Alpine meadows rather than cliffsides. You need both to understand the range. This guide covers them in sequence.
Planning Your Trip
When to Visit
The Dolomites hiking season runs from June to September, with conditions varying significantly across these months.
June: Fewer crowds, wildflowers blooming, snow still visible on high peaks creating dramatic contrast. Some higher trails may still have snow patches, and temperatures are cooler.
July–August: Best weather, warmest temperatures, all trails fully accessible. However, this is peak summer holiday season, therefore expect significantly more crowds and higher accommodation prices.
September (my recommendation): Fewer crowds than July/August, still good weather, autumn colors beginning to emerge in late September. Weather can be less predictable (I experienced a couple of days of rain and even some snow in mid-September), days are slightly shorter, and some rifugios and cable cars begin closing for the season.
How Long to Stay
One week is the perfect amount of time for a first-timer.
This gives you:
- 3 full days based near Cortina d’Ampezzo
- 3 full days based near Ortisei
- 1 buffer day for bad weather or relaxation
A week allows you to see the region’s major highlights without rushing, build in flexibility for weather, and experience both sides of the Dolomites (which are dramatically different in character).
If you only have a few days, you’ll need to choose one base and focus on that area. Cortina offers more physically demanding hikes and iconic peaks; Ortisei is more accessible via cable cars and offers gentler alpine meadow landscapes.
For a more in-depth trip (10–14 days), you could have extra time for longer hikes or multi-day rifugio stays, additional outdoor adventures including more challenging via ferrata routes, or a more relaxed pace but still hitting all the major spots.
Two-Base Strategy
The Dolomites span a large area, and trying to see everything from a single base means spending hours driving back and forth. In this guide to hiking the Dolomites, I recommend splitting your time between two strategic bases:
Cortina d’Ampezzo (Eastern Dolomites):
- Access to: Tre Cime, Cadini di Misurina, Lago di Sorapis, Cinque Torri, Nuvolau, Lagazuoi
- Highlights: More rugged, dramatic peaks; physically demanding hikes; iconic limestone formations
- Vibe: Upscale mountain resort town, good amenities, relatively expensive
- Closest major international airport: Venice (2hour drive), Verona (3hours drive), Innsbruck in Austria (2.5 hours drive)
Ortisei (Western Dolomites):
- Access to: Seceda, Alpe di Siusi, Sassolungo, St. Magdalena, Geisleralm
- Higlights: Alpine meadows, cable car access, gentler landscapes; easier for families
- Vibe: Charming Ladin-culture village, excellent restaurants, also relatively expensive
- Closest major internation airport: Verona (2h drive), Milan (3h drive), Venice (3h drive), Innsbruck in Austria (1h45min drive)
Why these two? They’re the optimal bases for exploration—large enough to have excellent amenities (restaurants, equipment rental, accommodations) while providing efficient access to the region’s best sights.

Downside: Prices are higher than smaller surrounding towns. If you’re budget-conscious, consider staying in nearby alternatives:
- Near Cortina: Lago di Misurina (20 minutes east)
- Near Ortisei: Santa Cristina (5 minutes east) or Selva di Val Gardena (10 minutes east)
Transportation: Rent a Car
I highly recommend renting a car.

The Dolomites have public transport—buses connect major towns and trailheads—but service is infrequent, and you’ll spend a significant amount of time waiting or coordinating schedules. A rental car offers:
- Flexibility: Leave when you want, adjust plans based on weather, explore at your own pace
- Access: Some trailheads (Cinque Torri, Cascate di Fanes) are easier to reach by car
- Spontaneity: Stop for photos, change plans mid-day, scenic drives
My route: I picked up a car in Venice, drove to the Dolomites (first Cortina then Ortisei), and finally dropped it off in Verona. This worked perfectly—no backtracking, and I got to see additional parts of northern Italy. However, your route depends on where you’re flying in/out and what else you’re visiting in Italy.
Driving in the Dolomites: Roads are well-maintained but winding, with steep grades and tight hairpin turns. If you’re comfortable with mountain driving, it’s manageable. GPS is essential.
Fitness Level Required
I like hiking and have done multi-day treks, but I’m no expert. Most of the hikes in this guide are moderate, with a few more challenging options.
This itinerary is flexible enough to accommodate different fitness levels:
- Low fitness / families: Focus on cable car–accessible viewpoints and shorter walks
- Moderate fitness: All hikes in this guide are doable with reasonable preparation
- High fitness: Combine multiple hikes in a day, add via ferrata routes, extend trails beyond the main viewpoints
The sample itineraries below offer intensive, moderate, and relaxed options to help you choose what fits your abilities and preferences.
What is Via Ferrata?
Via ferrata (Italian for “iron path”) is a protected climbing route built into a mountain, featuring permanent steel cables, metal ladders, rungs, and bridges fixed into the rockface.
Via ferratas originated in the Dolomites during World War I, when soldiers needed to move quickly and safely through treacherous mountain terrain. Today, they’re popular recreational routes that allow non-climbers to access dramatic high-altitude terrain with relative safety.
What makes it different from hiking? You’re often exposed to significant height and steep drops, but the steel cable and fixed hardware provide security. You clip into the cable using a specialized harness and carabiners, allowing you to safely traverse sections that would otherwise require technical climbing skills.
Is it scary? It can be, especially if you’re afraid of heights. But when done properly with the right equipment, it’s safer than many exposed hiking trails. The key is choosing routes appropriate to your comfort level.
I’ll cover via ferrata in detail when we get to Cascate di Fanes, which is a perfect beginner-friendly introduction to this style of climbing.
Cortina d’Ampezzo Base (Eastern Dolomites)
Cortina is your base for the more dramatic, iconic side of the Dolomites—towering limestone peaks, exposed ridgelines, and physically demanding hikes.
The town itself is an upscale mountain resort with excellent restaurants, equipment shops, and accommodations. It hosted the 1956 and 2026 Winter Olympics and maintains that polished, international feel.
I’ve chosen these hikes because they represent the best of what the Cortina area offers: iconic peaks, accessible lakes, technical routes, and historical significance. Some are crowded for good reason. Others remain surprisingly quiet despite their beauty.
Tre Cime di Lavaredo: Dramatic Limestone Peaks
Why this hike: The most recognizable sight in the entire Dolomites. If you only do one hike in Cortina, make it this one.
Tre Cime di Lavaredo—”Three Peaks of Lavaredo”—are three distinctive, finger-like limestone towers rising nearly 1,000 meters above the surrounding plateau. They’re instantly iconic, and for good reason: the sheer verticality, the pale stone glowing in morning light, the way the peaks frame the sky—it’s a landscape that doesn’t feel real until you’re standing beneath it.
The Tre Cime remind me of the Torres del Paine towers in Chilean Patagonia—similar in shape and visual impact, though geologically very different.
The Hike:
The classic Tre Cime loop circles the peaks and returns to the parking lot. Officially, the loop is done counterclockwise, but I highly recommend going clockwise.

Here’s why: you face the most beautiful views for most of the trail, and you’ll encounter fewer people in the first half since most hikers go the official direction. By the time you reach the busiest sections (around the halfway point), the morning rush has dispersed somewhat.

The trade-off is that you’re going against the flow of traffic, so you’ll pass more people coming the opposite direction.
There are two key photo spots along the trail:
- Rifugio Locatelli (roughly halfway) — stunning view of the north faces from the terrace, definitely stop here for a capuccino and take in the view
- Base of the towers (15 minutes past the rifugio if going clockwise) — directly beneath the peaks, the most dramatic perspective


Key Stats
- Distance: 9.7km
- Elevation gain: 430m
- Time needed: 3hours without breaks
- Starting point: Parcheggio Auronzo (pre-booking parking spot is absolutely necessary, do so at their official website)
Difficulty: Easy to Moderate. The trail is well-marked and practically impossible to get lost because of the number of people on the trail, you can always follow the crowd. The trail doesn’t involve scrambling, but it’s quite long with a few short sections that are steeper. There are three huts along the route and one more at the parking spot, so plenty of opportunities to re-supply.
Timing: Go early. I left the hotel in Cortina just before sunrise and arrived at the parking lot as the sky was beginning to lighten. I easily got a space but it was filling up steadily. By mid-morning the lot is almost full and the trail busy. The difference between arriving at dawn and arriving at 9am isn’t just about crowds, the morning light on those limestone towers in the first hour of the day is the reward. Don’t sleep through it.
Important: Tre Cime and Cadini di Misurina share the same parking lot at Rifugio Auronzo. If you’re doing both, plan to visit Cadini first (at sunrise) before most people arrive, then do the Tre Cime loop afterward.
Cadini di Misurina: Unbelievable Viewpoint
Why this hike: If Tre Cime is the most famous, Cadini di Misurina is the most photogenic.
This spot has exploded on social media in recent years, and it’s one of the rare cases where the hype is justified. The viewpoint overlooks a dramatic amphitheater of jagged limestone spires—dozens of sharp, chaotic peaks rising from a deep valley. The scene is surreal, almost fantastical. People often describe it as the real-life Mordor from The Lord of the Rings.
The Hike:
The hike is a short one with maximum reward, it is a there and back starting from the same parking lot as Tre Cime. It starts steep but flatens out quickly. The slightly bigger challenge is navigating the cliff side path after the steep section. The path isn’t too narrow but I can see how people afriad of height might struggle.

The biggest challenge is the queue
Here’s the problem: only one person or group can access the famous viewpoint at a time. One person (or one group) scrambles up a narrow, exposed path, takes photos, and scrambles back down. Each turn takes at least 5–10 minutes (longer if taking drone shots), which means queues form quickly.
By 10:30 AM when I arrived (after doing Tre Cime first), there were over 30 people waiting. Because the queue moves slowly, this translates to a 1–2 hour wait.

My recommendation: Go to Cadini first, at sunrise, before doing Tre Cime. You’ll have the viewpoint to (mostly) yourself (or share it with just a handful of early risers), and avoid the long queue.
There is an alternative viewpoint that most people don’t know exists — positioned directly above the famous one, with nearly identical sightlines. The peaks are the same, the composition is the same, the sense of scale is the same. I used this when I arrived too late to face the queue, and I left genuinely satisfied.
To be honest about it: reaching the main viewpoint would have been the cherry on top — the scramble adds something, and there’s probably a marginal difference in perspective at the very edge. But the alternative is not a consolation prize. The view itself is what people come for, and the view is there. Here is the location of the alternative viewpoint, and the path is visible in satellite view.
If you go early enough to avoid a queue, do the main one. If you arrive late like I did, go straight to the alternative and don’t spend two hours of a good hiking day standing in line.
Key Stats
- Distance: 3.9km
- Elevation gain: 140m
- Time needed: 1hour without breaks
- Starting point: Parcheggio Auronzo (pre-booking parking spot is absolutely necessary, do so at their official website)
Difficulty: Easy. The trail is short but starts steep, then moderates quickly. As you approach the viewpoint, the trail narrows, so be careful when there’s oncoming traffic.
Timing: Early morning, ideally sunrise. Even early, there might be a short queue at the main viewpoint.
Lago di Sorapis: The Most Stunning Alpine Lake
Why this hike: An extraordinary turquoise alpine lake with color so vivid it rivals Lake Moraine or Lake Louise in Banff, Canada, but in a much more intimate, enclosed setting.
The water when I arrived on a cloudy day was a milky turquoise, more pale than vivid, somewhere between glacial and opaque. On a clear day it’s reportedly more saturated, but the version I saw had its own quiet beauty. The color comes from glacial flour (fine rock particles suspended in the water) and it shifts throughout the day as light changes.

There’s a beautiful rifugio near the lake, called Rifugio Alfonso Vandelli, where you can rest and grab snacks before heading back.
The Hike:
The hike is a there and back. The trail is slightly more difficult than the Tre Cime loop, with exposed sections along narrow paths cut into cliffsides. There are iron handrails bolted into the rock on the uphill side, but the drop-off side is unprotected. There is a beautiful refuge near Lago Sorapis, where you can sit and grab some snacks before heading back the same way.
If you have vertigo or are uncomfortable with exposure, this hike may not be for you. That said, the handrails provide security, and thousands of people complete this trail safely every year. Just take your time and don’t look down if heights bother you.
Key Stats
- Distance: 13.2km
- Elevation gain: 850m
- Time needed: 4hours without breaks
- Starting point: Parking is just along the road near the trailhead (exact location), hence spots are quite limited and there is no space for you to wait around for other people to leave.
Difficulty: Moderate. The trail is fairly long, and some sections are narrow along cliffsides. The trail is well-maintained with metal handrails where you need them most. Don’t attempt this in sneakers—shoes with good grip are essential.
Timing: Parking is tricky since spots are along the main road and are limited in number and there’s no overflow area. Arrive early in the morning, or get there just after noon when the morning crowd starts leaving. If you choose the latter, make sure you have a good sense of your hiking ability (check out the practical info below to better estimate your hike time) and can finish before dark.
Cascate di Fanes Via Ferrata: Beginner-friendly Adventure
Why this route: This is my pick as an underrated but must-visit site in the Dolomites. If you’re curious about via ferrata but intimidated, this is the perfect introduction.
I was keen to try via ferrata but also found it scary. Cascate di Fanes is a family-friendly route that provides a thrilling introduction without requiring advanced skills, extreme fitness, or nerves of steel.

The route follows a waterfall through a narrow gorge, using metal ladders, cables, and fixed rungs to ascend sections that would otherwise be impassable. You’re clipped into the steel cable at all times, moving hand-over-hand up vertical or near-vertical rock faces while water cascades beside you. You get the adrenaline of exposure and height, the satisfaction of physical challenge, and access to terrain you couldn’t otherwise reach, all with the security of permanent fixed gear.
Cascate di Fanes is perfect for complete beginners. The difficulty is low, the route is short, and the setting is dramatic without being too intimidating.
The most stunning part: You go behind the waterfall. Expect to get wet, but it’s such a fun experience getting close to the powerful water rushing past.
To me, the hardest part for me wasn’t the height or the exposure. It was getting close to the waterfall itself. The spray is relentless, the rock underfoot is a bit slippery, and the cold hits you before you expect it. There’s a moment where you’re leaning into wet rock with water rushing past your face and your gloves doing most of the work, and you just have to commit and keep moving. That’s the moment you’ll be describing to your friends when you get home.

Via Ferrata Basics:
Via ferrata offers a unique experience—it’s not hiking, and it’s not technical climbing, but something in between. You get the adrenaline of exposure and height, the satisfaction of physical challenge, and access to terrain you couldn’t otherwise reach, all with the security of permanent fixed gear.
The route can be done as ascent or descent. The official website recommends descent, which is what I did. In terms of views and difficulty, I don’t think direction makes a huge difference, though on busier days it’s nicer if most people are going the same way.
Key Stats
- Distance: 9.7km
- Elevation gain: 470m (of which 300m via ferrata)
- Time needed: 45min approach, 1h30min ferrata, 1h return, 3h15min total (This is the reocmmended time from the official website, but do know that because there is a level of technicality involved so the time required could vary drastically from person to person.)
- Starting point: parking at Cascate di Fanes (location here)

Equipment:
You must rent via ferrata gear (harness, lanyard, helmet) from a shop in Cortina. There are quite a few shops in Cortina that offer such service. I rented through https://www.snowservice.it/. Mostly because this was the first shop that popped up on a Google search. I can confirm that it is an easy process with them and the equipments are well maintained. Staff will show you how to use the system—it’s straightforward.
What to bring:
- Gardening gloves (bring your own for better grip on the cable)
- Waterproof layers (unless there’s been a dry spell, you’ll get wet from the waterfall)
- Shoes with excellent grip (most surfaces along the route are wet and slippery)
Difficulty: Moderate. It is hard to grade a via ferrata route. For the highly experienced via ferrata climbers, this is literally one of the easiest route out there. But for the inexperienced, this would be challenging.
Timing: Good all day, the parking lot is not huge but it is less popular than say Tre Cime. Best done when weather is nice. Not recommended after heavy rain—the waterfall can become dangerously strong.
Lago di Braies: Boating and Easy Trails
Why (or why not) this spot: Instagram-famous, undeniably beautiful, but very touristy.
I have mixed feelings about Lago di Braies.
It’s beautiful—a turquoise lake surrounded by forest and limestone peaks in a distance, with a charming boathouse and walking path around the lake. The setting is postcard-perfect, and it’s easily accessible (no hiking required), which makes it popular with families, tour groups, and casual visitors.
But that accessibility means crowds persist all day—morning, afternoon, evening. It’s one of the few places in the Dolomites where the experience feels diluted by sheer numbers.
Who this is for: If you prefer dramatic mountain views over lake scenes, you can skip this. It’s nice for photos, but not essential. For those who don’t mind the crowd and prefer something more gentle, this is a great spot to linger for the day.
What you can do:
- Rent a rowboat for the picture-perfect shot
- Walk the gentle loop trail around the lake
Starting point: parking at Lago di Braies
A better alternative: Lago di Misurina is a nearby lake that’s slightly less photo-perfect but far less crowded. It offers similar alpine lake charm without the overwhelming tourist presence. If you are coming from Cortina d’Ampezzo going to Tre Cime, you will most certainly pass by this lake. So it is easy to fit into any itinerary for a short visit.
Cinque Torri and Rifugio Nuvolau: Rock Towers and the Oldest & Most Panoramic Mountain Hut
Why this hike: A combination of striking rock formations, a panoramic mountain hut with 360-degree views, and a moderate loop connecting both. This is a highlight of the Cortina area.
Cinque Torri (“Five Towers”) is a cluster of five distinctive limestone towers rising from a rocky plateau. The formations are dramatic, and the area saw intense World War I fighting—trenches, bunkers, and artillery positions remain visible, adding historical weight to the landscape.
Rifugio Nuvolau, perched on a high peak, offers 360-degree views of the surrounding Dolomites. You can see Tre Cime in the distance, the Marmolada glacier, the Sella massif, and valleys dropping away in every direction. It’s one of the best panoramic viewpoints in the region. The terrace is the perfect spot for lunch with a view.
The Hike:
I opted to do a loop trail linking Rifugio Nuvolau and Cinque Torri. Though there are easier ways to reach Cinque Torri via cable car.
I parked at Col Gallina parking along the main road. The trail leads you to Lago di Limides, a small intimate alpine lake with great reflection of the surrounding peaks. Take a small rest before ascending steeply to Rifugio Averau via Forcella Averau. Rifugio Averau is the perfect spot for a mid-morning rest before climbing further to Rifugio Nuvolau, where you can linger on the terrace and enjoy lunch before descending to Cinque Torri. Though Cinque Torri is a popular destination in the Dolomites, most people access it via cable car. This loop trail is rather quiet, and I really enjoyed that aspect.


From the terrace of Rifugio Nuvolau, you have panoramic view of the surrounding area. The photos from left to right, the Marmolada Glacier, Cortina Valley and the Cinque Torri flanked by the Tofane mountain.

The WWI Open Air Museum at Cinque Torri is worth exploring in depth, not rushing through. Stone-lined passages cut directly into the rock, wooden structures reconstructed, rusted equipment, and period photographs positioned where soldiers would have actually used them. It gives you a concrete, physical sense of what it meant to fight a war in the mountains. History is easier to absorb when it’s somewhere you can physically inhabit.
Key Stats
- Distance: 9.7km
- Elevation gain: 600m
- Time needed: 3hours without breaks
- Starting point: Col Gallina parking near the main road (location here)
Alternative (easier): Take the cable car up to Rifugio Scoiattoli (right next to Cinque Torri), then do a there-and-back trail to Rifugio Nuvolau. Round trip from Scoiattoli to Nuvolau takes around 1 hour without breaks. Park at the lower cable car station.
Difficulty: Moderate to hard. It is a fairly long route. The most difficult bit is the ascent through Forcella Averau. The ascent is steep and requires sure-footedness, and some very light scramble on rocky terrain.
Timing: Good all day, the parking lot is decent sized.
Rifugio Lagazuoi: WWI Tunnels and Open-Air Museum
Why this site: Accessible via cable car (family-friendly), but what makes it truly special is the World War I tunnel system built directly into the mountain.
Historical Context:
During World War I, the Dolomites became a brutal battleground between Italian and Austro-Hungarian forces. Fighting at high altitude in winter conditions was horrific—soldiers endured freezing temperatures, avalanches, supply shortages, and constant bombardment.
At Lagazuoi, Italian forces tunneled deep into the mountain to get beneath Austrian positions. The tunnels were dug by hand, lit by candlelight, and used to move troops and supplies in secret. Some were used for surprise attacks; others were packed with explosives to blow up enemy fortifications.
The Tunnels Today:
You can hike through these tunnels, walking the same paths soldiers marched over 100 years ago. The experience is eerie—narrow passages, uneven wooden steps, darkness broken only by occasional shafts of light from openings in the rock.
The tunnel is usually descended after taking the cable car to the top station. The upper entrance can be easily reached on a signposted path from Rifugio Lagazuoi and the top cable car station in around 10–15 minutes.

Tunnel Stats
- Distance: 1.2km
- Elevation gain: 640m
- Time needed: 1.5hour without breaks (can vary significantly due to darkness, low clearance, uneven big steps)
My Approach: Experiencing history without fully commiting
I explored the upper section with a headlamp and turned back after about 15 minutes. That was enough to get the point: the darkness, the low clearance, the uneven steps worn smooth, the occasional shaft of pale light from an opening in the rock. I didn’t find it too scary or claustrophobic. It was stranger than that — a quiet, slightly eerie glimpse into something that happened at extreme cost to people who were also just trying to get through the day.
The experience does thin out the longer you go. If you do the full descent, know that the historical payoff front-loads as the initial section is the most evocative. But even a brief visit earns its place. Also, if you’re not doing the full tunnel, you can turn around and bail anytime, which is worth knowing before you start.
Important: The path to the tunnel entrance is signposted and easy to find, but it’s very exposed with steep drops on either side. Exercise caution and do not attempt in bad weather.
If you want to do the full tunnel descent, you’ll need:
- Headlamp with spare batteries (essential as it frees both hands and provides better light than a phone)
- Via ferrata equipment (this is good to have to ensure safety)
- Good footwear (stairs are uneven, sometimes slippery)
- Time (full descent takes at least 1.5 hour because of darkness, sometimes low overhead clearance and uneven steps)
Difficulty: Moderate. The route down to the tunnel entrance is short but very exposed. The path inside the tunnel is uneven but that is part of the charm.
I personally think the tunnels are the highlight of the area, but the refuge itself occupies an enviable spot with 360-degree dramatic view. And you can see pretty much all the prominent peaks in the region. Therefore it is worth the trip even if you are not planning to visit the tunnels. Beyond the tunnels:
- Enjoy panoramic views from the terrace of Rifugio Lagazuoi
- Take the easy family trail to the summit cross of Mt. Lagazuoi for unobstructed views of the most famous Dolomite peaks, including the Tofane and Marmolada glacier
- The path is very wide and easy, accessible even by wheelchair or baby carriage

Sample 3-Day Itineraries for Cortina
Choose based on your fitness level and hiking appetite, I did the intensive 3-day in Cortina because I wanted to see it all. The most tiring day is probably the first day.
Intensive (Maximum Sights):
- Day 1: Tre Cime and Cadini di Misurina in the morning, then Lago di Sorapis in the afternoon (long day with loads of hiking, start very early)
- Day 2: Lago di Braies in the morning, then Cascate di Fanes via ferrata in the afternoon
- Day 3: Cinque Torri and Rifugio Nuvolau loop in the morning, then Rifugio Lagazuoi and WWI tunnels in the afternoon
Moderate (Balanced):
- Day 1: Tre Cime and Cadini di Misurina full day
- Day 2: Lago di Sorapis full day
- Day 3: Cinque Torri and Rifugio Nuvolau loop full day
Relaxed (Least physically demanding):
- Day 1: Tre Cime or Cadini di Misurina (choose one)
- Day 2: Lago di Braies for a relaxed day by the lake
- Day 3: Rifugio Lagazuoi (cable car up, family walk and maybe a short tunnel visit)
The Drive to Ortisei: Gardena Pass
After three days based in Cortina, drive west to Ortisei through the Gardena Pass (Passo Gardena)—one of the most scenic mountain drives in the Dolomites.
The drive is around 65 kilometers and takes about 1 hour 40 minutes, but you’ll want to allow more time. The pass winds through dramatic alpine terrain, with viewpoints offering sweeping vistas over valleys and peaks. Stop for photos—this is part of the experience, not just a transfer between bases.

Jimmi Hütte: A Highlight of the Pass
If you have time, take the cable car up to Jimmi Hütte, a mountain hut perched high above the pass. This was one of the best mountain huts I ate at during the entire trip.
Calling it a “hut” undersells it. Jimmi Hütte feels more like a full-service restaurant than a rustic alpine refuge. The food is excellent (I had pasta and a cold cut platter), the views are spectacular (surrounded by snow-capped peaks), and the setting is perfect for a leisurely lunch.
Prices aren’t cheap—expect to pay similar to a nice sit-down restaurant in town—but it’s worth it for the quality and location.
Cable Car Pass Consideration:
Consider buying the Gardena Pass, which covers quite a few cable cars in the areas near Ortisei, so it should come in handy and could potentially save money if you plan to use cable cars frequently in the next few days. More on this from their official website.
Ortisei Base (Western Dolomites)
Ortisei is your base for the gentler, more accessible side of the Dolomites—alpine meadows, rolling hills, and landscapes you can reach via cable car without strenuous hiking.
The town sits in Val Gardena, a valley known for its Ladin culture (a distinct Romance language and cultural identity, though this is more historical context than something you’ll actively notice as a visitor). Ortisei is charming, walkable, and less international in feel than Cortina—it caters more to Italian and German-speaking visitors.
What you see on the Ortisei side is dramatically different from Cortina. Where Cortina offers jagged peaks and exposed ridgelines, Ortisei provides sweeping meadows, softer slopes, and panoramic views across vast alpine plateaus.
You need both bases to experience the full diversity of the Dolomites. Cortina gives you the iconic dramatic peaks—Tre Cime, Cadini, Sorapis. Ortisei gives you equally essential experiences—Seceda’s impossible ridgeline, Alpe di Siusi’s sprawling meadows. If you only did Cortina, you’d miss some of the region’s most distinctive landscapes.
If you only have 3 days total, you’ll need to choose. But if you have a week, doing both is essential.
Seceda: Dramatic Ridgeline
Why this location: The other icon of the Dolomites, alongside Tre Cime.
Seceda is frequently cited online as the real-life inspiration for the ⛰️ Mountain emoji. The claim circulates widely and the resemblance is striking, though the emoji’s actual origin is unconfirmed. Regardless, once you see the ridgeline in person, you understand why the comparison stuck.
Seceda’s distinctive ridgeline—a sharp, one-sided sloping peak—perfectly mirrors the emoji’s design. Its shape is so recognizable that it’s become the archetype for what a mountain looks like in our digital vocabulary.
And once you see it in person, you understand why. The ridgeline looks almost artificial, like someone took a massive knife and sliced half the mountain away at a perfect angle. The peaks resemble jagged teeth or a dragon’s spine, rising abruptly from green slopes below.
You won’t find anything quite like it anywhere else in the world. Photos don’t capture the surreal quality of standing there—the scale, the angle, the way it dominates the landscape.

Access is incredibly easy. Take the cable car from Ortisei (or Santa Cristina) up to the Seceda viewpoint. From the top cable car station, it’s a 10-minute walk to the best photo spot. The path involves a short, slightly steep climb, but it is clearly signposted and no hiking experience is required.
Because of its accessibility and fame (again, it’s literally an emoji), expect quite a few people to be at the viewpoint. But the overall area is large enough that it rarely feels overcrowded.
What to do:
I didn’t do much hiking here. I went up to the main viewpoint, took in the scenery, and spent time just sitting and absorbing the landscape. Honestly, the best view is right at the viewpoint. There’s a network of trails if you want to explore further, but hiking further doesn’t dramatically improve the perspective.
Timing: Good all day. I visited in the afternoon under imperfect weather with some fog rolling through, but it actually added to the drama. The ridgeline is striking in any light.
There are two cable car which could bring you to (or close to) the Seceda ridgeline. One from Ortisei and another from Santa Christina. Check out the official website for costs and operating hours.
Alpe di Siusi: Europe’s Largest Alpine Meadow
Why this location: You don’t often see lush, rolling alpine meadows of this size. Alpe di Siusi is Europe’s largest high-altitude plateau—a vast expanse stretching for miles, dotted with wildflowers (in summer), grazing cows, and traditional mountain huts.
It’s not dramatic in the way Tre Cime or Seceda are. It’s softer, more pastoral, almost dreamlike in its tranquility. But that’s exactly the appeal. After days of steep ascents and exposed ridgelines, Alpe di Siusi offers something gentler: space to breathe, easy walking, and a deeply relaxing atmosphere.
It’s the kind of place where luxury hotels have set up on the meadow itself, taking advantage of the views and the calm.
My Visit:
I visited in early September after an unusual snowstorm the day before. The meadows were blanketed in snow—it is quite rare for September—creating a stark, wintery black-and-white landscape. The weather made planning tougher, but it brought a visual I wouldn’t have seen otherwise. The snow-covered plateau felt even more dramatic than I’d expected.
Under typical conditions (green meadows, clear skies), the plateau is equally beautiful, just in a completely different way.

What to Do:
This is a place for relaxed walking, not challenging hikes. The terrain is flat or gently rolling, paths are wide and easy, and the atmosphere is calm. Families, older hikers, and anyone looking for a break from steep ascents will appreciate Alpe di Siusi.
You can also rent a bike or e-bike to explore further. The meadow is relatively flat, making cycling an excellent option for covering more ground. I didn’t rent one (I preferred walking), but I saw plenty of people enjoying the trails by bike.
From the meadow, you can see the Sassolungo group in the distance—its jagged profile rising from the plateau floor. The view from here is excellent, though the peaks are quite far away. If you want to get up close and personal, do the Sassolungo hike with the coffin cable car (described next).
Staying Overnight:
There are quite a few luxury hotels on the meadow itself, as well as simpler mountain huts. Staying overnight would give you access to sunrise on the plateau, which is supposed to be spectacular. I didn’t stay, but if you have the budget and want that experience, it’s an option.
Sassolungo: Experience the Coffin Cable Car
Why this hike: Dramatic limestone peaks rising sharply from the Alpe di Siusi plateau, accessed via one of the most unique (and slightly unnerving) cable cars in the Dolomites.
Sassolungo is famous for the Telecabin Forcella del Sassolungo, colloquially known as the “coffin cable cars.” These are small, enclosed cable cars that look vaguely coffin-shaped, ascending steeply to higher elevations.

Unlike modern gondolas that slow down near embarkation points, the coffin cable cars don’t really slow down much at all. You have to run into them when boarding, and run out when disembarking. The cable car itself is very narrow—only enough room for two passengers standing comfortably.
If you’re afraid of heights, they’re a bit unnerving. But they’re safe, and they’re part of the experience. I found it more exciting than scary. Running a few steps to jump on and off added a thrill I wasn’t expecting. It’s not dangerous, but it does require a bit of coordination and quick movement.
The Hike:
Once you reach the top, you step off right outside Toni Demetz Hütte, where you can grab a coffee (I did) and enjoy the view down into the valley.
From here, you have two options:
- Take the same cable car back down
- Do a loop trail that descends on the other side of the pass and circles back to the lower cable car station (recommended)
I did the loop. The cable car has already done most of the climbing, so you start from the high point and hike down through Forcella del Sassolungo. This is the most difficult part of the trail—fairly steep and gravelly. The view is incredible though, looking out over the Alpe di Siusi meadow.
I found the descent manageable without poles, but if you’re not used to navigating technical terrain, trekking poles are recommended.
As you near the bottom, you’ll reach Rifugio Vincenza. The location is incredible—views back up the valley you just descended, and on the other side, excellent views of Alpe di Siusi. I loved sitting on the terrace here. It’s the perfect reward after the steep section.
From Rifugio Vincenza, the trail loops around the base of the mountain, then back to the parking lot.


As you reach the bottom, loop around the mountain to get back to the parking lot. Follow the signs for Rifugio Comici in northern direction. You’ll be hiking up and down through a diverse landscape for a while, along the path that leads to Col de Mesdi. From here you can enjoy an incredible view of the high northern wall of the Sassolungo.
Key Stats
- Distance: 8.4km
- Elevation gain: 210m (this is because the cable car has done most of the heavy lifting)
- Time needed: 3hours without breaks
- Starting point: Passo Sella parking lot opposite to the cable car station
Difficulty: Moderate. The cable car does the hard work. The descent through Forcella del Sassolungo is steep and gravelly but manageable with care. Due to the high altitude, snow can be found around the Sassolungo group year-round.
St. Magdalena and Geisleralm: The Most Picturesque Church
Why this area: St. Magdalena is a small church set against a dramatic mountain backdrop—one of the most photographed viewpoints in the Dolomites. San Giovanni Church is an even smaller church on a meadow, lonely but dramatic. Geisleralm, accessible via an easy hike from the same parking area, offers equally stunning views of the same peaks from a different angle.
St. Magdalena Church:
The church itself is simple, but the setting is extraordinary. Green meadows in the foreground, the jagged Geisler peaks (Odle di Funes) rising vertically in the background, traditional alpine farmhouses scattered across the valley. It’s the kind of scene that looks impossibly perfect, yet it’s completely real.

Access: Easy with a car. Drive to the parking lot near the church, and walk around the area. There are short trails leading to slightly elevated viewpoints if you want different perspectives.
San Giovanni Church:
A few minutes away sits San Giovanni. It is smaller still, and positioned in isolation in the middle of a meadow. The same peaks behind it, the same green foreground, but without even the village around it. The loneliness of it is the point. It can get busy at peak times, which undercuts the atmosphere, so visit early and manage expectations. Even crowded, it’s worth the five-minute detour.

Geisleralm Hike (Adolf Munkel Way):
From the same parking area, you can hike to Geisleralm, a mountain hut at the base of those same dramatic peaks you see behind St. Magdalena church.
This is a straightforward, well-maintained trail — the kind you can do on slightly tired legs at the end of a big week. The grade is gentle enough that it never demands much, and the reward is gradual rather than sudden. As you approach Geisleralm, the same mountains you saw behind St. Magdalena church come much closer. The scale shifts, and what felt like a backdrop becomes a presence. The hut sits right at the base of the peaks, and it’s a good place to stop for a meal, and look up at what you’ve been walking toward.
This is the best reason to do the hike rather than just visiting the churches. The view from the meadow is beautiful, but the view from the hut makes you understand how big those peaks actually are.
Stats (Geisleralm hike):
- Distance: 9.2km
- Elevation gain: 370m
- Time: 2.5 hours without breaks
- Starting point: St. Magdalena parking area
Difficulty: Easy. Well-maintained trail, gentle grade, suitable for most fitness levels.
Timing: Good all day for both the churches and the hike
Bolzano: Ötzi the Iceman Museum
Why visit: If you need a break from hiking—whether due to bad weather, sore legs, or just wanting a change of pace—Bolzano’s South Tyrol Museum of Archaeology is the best indoor option in the region.
The museum is home to Ötzi the Iceman, a 5,300-year-old naturally mummified human discovered in 1991 in a glacier on the Austrian-Italian border. Ötzi is incredibly well-preserved—you can see his skin, hair, tattoos, clothing, tools, and even the contents of his stomach.
What stayed with me was the clothing and tools. A copper axe, a bow, a fire-starting kit. Everyday objects from 5,300 years ago, still legible as functional things a person relied on. The museum does well at making Ötzi feel less like a specimen and more like someone who was interrupted mid-journey.
The museum does an excellent job contextualizing Ötzi’s life, death, and the scientific discoveries made from studying his remains. It’s fascinating, sobering, and genuinely world-class.
Worth a half day, especially if weather forces you indoors. Alternatively, if you’re heading to Verona after the Dolomites (like I did), Bolzano is an easy additional stop on the way.
QC Terme Dolomiti: Relax in Thermal Waters
Why visit: A luxury thermal spa offering the perfect opportunity for relaxation after several days of hiking.
QC Terme is quite large, and the setting is beautiful, the facilities are well-maintained. The outdoor pool is the best of it — warm water, cold mountain air, the kind of contrast that makes you stay longer than you planned. But the real value is the variety: indoor pools, outdoor pools, multiple saunas, steam rooms, cold plunges, relaxation rooms in between. Working through all of them takes a few hours and feels like a structured recovery session. After several consecutive days of hiking, that’s exactly what it is.
I visited on a day when bad weather made outdoor activities less appealing, and it was the perfect alternative. After multiple days of physical exertion, soaking in warm thermal water while looking out at the mountains felt deeply satisfying. Check our their official website for prices and opening hours.
One thing to note: QC Terme is quite far from Ortisei—just over 1 hour drive. Factor this into your planning.
Sample 3-Day Itineraries for Ortisei
Choose based on your fitness level and hiking appetite, I did the intensive 3-day in Ortisei because I wanted to ensure that I am not missing anything.
Intensive (Maximum Sights):
- Day 1: Sassolungo hike + QC Terme in the afternoon
- Day 2: Seceda + Alpe di Siusi
- Day 3: St. Magdalena + Geisleralm
Moderate (Balanced):
- Day 1: Alpe di Siusi
- Day 2: Seceda + Sassolungo cable car without the hike
- Day 3: St. Magdalena
Relaxed (Minimal Hiking):
- Day 1: Alpe di Siusi
- Day 2: Seceda
- Day 3: Spa day at QC Terme or museum in Bolzano
Practical Information
Accommodation
Cortina d’Ampezzo:
I stayed at the Radisson Residence, which was excellent—well-equipped rooms with a kitchen, allowing me to cook some meals and save money on dining out (prices in Cortina are high). The location was convenient, and the facilities were modern and comfortable.
Ortisei:
I stayed at Residence Cesa Sassela, which was high up on the slope with very nice views of the valley and surrounding peaks. In hindsight, staying lower in town would have been more convenient for accessing restaurants, shops, and the cable car base stations. The views were beautiful, but the trade-off in convenience wasn’t entirely worth it.
General Guidance:
Both Cortina and Ortisei are relatively expensive compared to other parts of Italy. Expect to pay premium prices for accommodations, especially in peak season (July–August). Consider the following areas for more budget-friendly accommodation choices.
- Near Cortina: Lago di Misurina (20 minutes east)
- Near Ortisei: Santa Cristina (5 minutes east) or Selva di Val Gardena (10 minutes east)
Car Rental and Driving
My Route:
I picked up a rental car in Venice, drove to the Dolomites, and dropped it off in Verona. This route worked perfectly—no backtracking, and I got to see additional parts of northern Italy (Verona is beautiful and worth a day).
However, your route depends on where you’re flying in/out and what else you’re visiting in Italy. Other common car pickup/drop-off combinations:
- Milan → Verona
- Venice → Venice (circular route)
- Innsbruck (Austria) → Verona (if coming from the north)
Driving in the Dolomites:
Roads are well-maintained but winding, with steep grades, narrow sections, and tight hairpin turns. If you’re comfortable with mountain driving, it’s manageable. GPS is essential and I recommend downloading offline maps in case cell service is spotty.
Parking: Generally not difficult. Most trailheads have parking areas, though popular spots (Tre Cime, Lago di Braies) can fill up early. Arrive early or book in advance where required.
Via Ferrata Equipment Rental
In Cortina d’Ampezzo, several sports shops rent via ferrata equipment.
I rented through Snow Service. The process was easy, and the equipment was well-maintained.
What’s Included:
- Climbing harness
- Via ferrata lanyard with shock absorber
- Two carabiners
- Helmet
Cost: Around €15–25 per day for a complete kit
Instruction: Staff will show you how to put on the harness and use the carabiner system. It’s straightforward—clip into the cable, move one carabiner at a time, stay connected at all times.
Bring Your Own Gloves: The kit doesn’t include gloves. Bring gardening gloves or purchase climbing gloves for gripping the steel cable.
Tools for planning a successful hike
Best weather app:
I used Meteoblue for weather forecasting in the Dolomites. Mountain weather changes quickly, so keeping your itinerary flexible based on conditions ensures you make the best use of your time.
Always check forecasts the night before and be willing to rearrange days if needed.
How I estimate hiking times when I am planning my trip
When I was planning my trip, I use a rough formula: 5 kilometers per hour on flat terrain, plus an extra hour for every 400 meters of elevation gain. For example, a 10-km hike with 800m of elevation gain should take me 4 hours based on this rough calculation. This helps me gauge whether I can combine hikes in one day or need to split them.
Your pace may differ. Test the formula on your first hike and adjust the numbers based on your actual speed. The best way to calibrate is to time yourself on a local trail before your trip, then apply that data to Dolomites hikes. This isn’t about being precise—it’s about having a realistic sense of what’s achievable in a day.
What to Pack
Clothing:
- Layered hiking clothes (temperatures vary with elevation)
- Waterproof jacket (weather can change quickly)
- Warm fleece or insulated layer (even in summer, high elevations are cold and windy)
- Sun hat and sunglasses (high-altitude sun is intense)
- Hiking shoes with good grip (so much better than sneakers)
Gear:
- Trekking poles (helpful on steep descents)
- Sunscreen (high SPF)
- Water bottles or hydration system
- Snacks and trail food
- Optional: Gloves for via ferrata (gardening gloves work fine) and headlamp (essential if hiking through Lagazuoi tunnels)
Final Thoughts
A week in the Dolomites is enough time to understand why it is one of the best hiking destinations in the world. The combination of dramatic limestone peaks, accessible trails, excellent infrastructure, and sheer visual diversity makes this a region that rewards every type of traveler from serious mountaineers to families with young children.
This guide prioritizes flexibility over rigid itineraries. Your fitness level, weather conditions, and personal interests will shape your days. Some people will want to pack in as many sights as possible; others will prefer lingering at a single rifugio, soaking in the views over a long lunch. The Dolomites accommodate both equally.
What matters most is giving yourself enough time. A week is ideal as it is long enough to see both sides of the range, experience different types of terrain, and build in a buffer day for bad weather or spontaneous changes.
That said, don’t mistake accessibility for ease. The hikes I’ve described here — Lago Sorapis, the Cinque Torri loop, the Fanes via ferrata — are real days out. They’ll tire you. The logistics of moving between two bases, managing parking, and planning around weather will require attention. Go with a rough plan and the willingness to swap days around when the forecast changes.
If the Dolomites have given you a taste for serious mountain hiking, the Tour du Mont Blanc is the natural next step — a multi-day circuit through three countries with some of the best views in the French Alps. Or if you’re already in northern Italy and looking to extend the trip, Bologna is two hours south by train and makes an excellent few days of eating well before heading home.


Leave a Reply